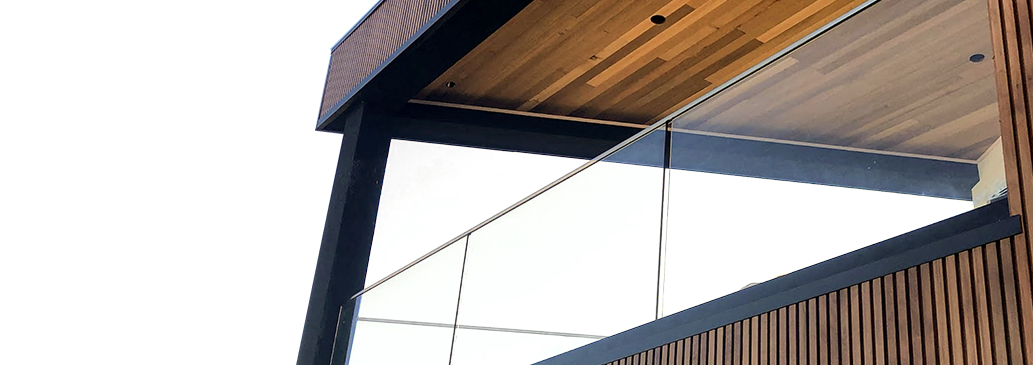
Our extensive product list includes 12 mm toughened glass panels, in both regular and hinge types, different gate width sizes and different styles of polished, satin or black spigots. All gate hardware such as latches and hinges in all angle and combinations are in stock and available.
Fast turnaround times for your DIY Glass Fencing Melbourne pickup, we also deliver and if you need us to install your new Fully Frameless Glass Pool Fence, we can arrange that too!
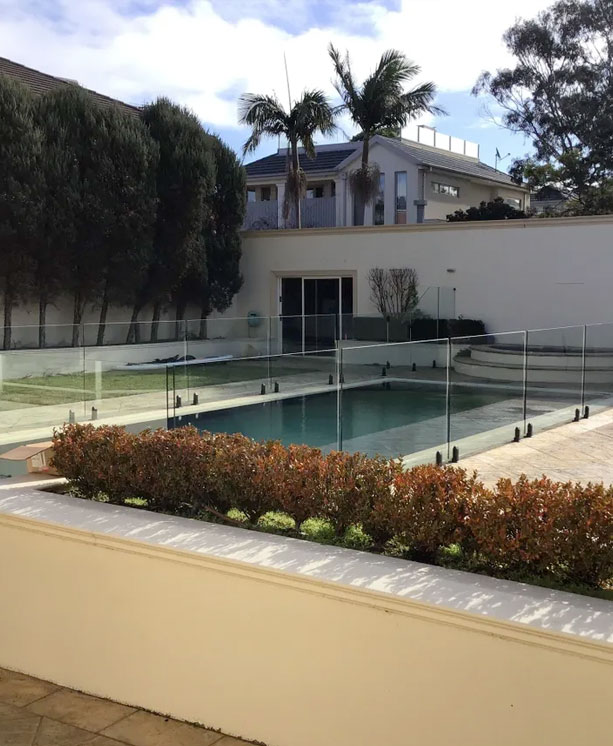
Before you start installing your pool fence, check with your local authorities to make sure that it complies with all of the regulations and the fence meets Australian Safety standards.
| Step 1 | Once you have worked out all your panel sizes and gaps, use a chalk line and string out your fence line. |
| Step 2 | Using a tape measure and pencil, mark out on your chalked fence line where the edge of the glass panels start and stop, remembering to include your gaps between each panel and gates. |
| Step 3 | Now that you have your fence layout marked out, use a pencil to mark the position of the spigots for drilling. |
| Step 4 | Using a 75mm core drill, core your holes to a depth of approx 120-150mm deep. Remove the core from the hole and sponge out the water from the holes. |
| Step 5 | Attach the spigots to the glass panels at the required distances. |
| Step 6 | Using the required height set down timber chocks. Position them just inside the outer edges of each panel of glass. |
| Step 7 | Position the dress rings over the cored holes. Then lift the panel and gently lower each spigot through the dress ring, into the core, so that the glass is now sitting on the timber chocks. The spigots should be free “floating” in the cored holes. |
| Step 8 | Using a spirit lever now begin to shim either end of the glass and chocks to achieve a straight level across the top edge of the glass. Be sure to check to make sure the glass panel is in the correct position referring to your markings on your fence line. |
| Step 9 | Now, using timber make a timber brace that will hold your panel upright. It can be anchored onto grass with a garden stake, for if you have no grass, then screw in a base plate and use something heavy to anchor the base plate to the ground. With one person holding the panel plumb screw support arms either side of the panel to complete the brace. The panel should now be secure, both level and plumb. Ensure you double check that you are happy with where and how it is sitting. |
| Step 10 | Now move onto the next panel and install as above. |
| Step 11 | Once you have completed all your panels and gates, the fence is now what we call “dry set”. Again use your sprit level, run over all the panels making sure they are level and plumb. Use your tape measure to make sure all your gaps are correct. Make sure the gate is seated correctly and operates well. Finally, run your eye over the fence, does it “look” right, position yourself at different angles. Make any minor adjustments as needed. |
| Step 12 | Mix up some class C construction grout. We recommend BOSTIK TECHFLOW HES or LANKO DURAGROUT 701. |
| Step 13 | Using a makeshift pourer, lift the dress rings up to the bottom for the glass and pour the grout into the cored holes until flush with the top of the hole. Lower the dress ring back down and move onto the next hole. Once you have grouted all your holes, sponge up any excess grout around the holes. Try and not wet the area to much. |
| Step 14 | After the required curing time (see grout bag for details), gently remove all your timber bracing and gently knock out your timber chocks. |
| Step 15 | Wet down your fence first, both sides, and use mild soapy water with a soft cloth or brush and wash down your fence, rinse straight away. |
| Step 16 | Step back and enjoy your new AVI Fully Frameless Glass Fence. |
| Step 1 | Measure and mark out where you want to put the posts for the pool fence. Hammer a nail in between the decking boards. Tie a string line to the nail. Run it beyond the length of the fence. Make sure it’s straight and tie it off tightly. In this case, we’ve used a brick to tie the string line to. |
| Step 2 | Following the instructions in the kit, measure and mark where your mini posts should be. Place the posts under the string line. Make sure the posts are in line with each other. Also keep them away from any gaps in the decking, so they can be properly secured. It is important to remember to make sure the mini posts are in the required length from the edge of the glass. For example:
1800 Width of panel divide by 3 = 600 This will give you the distance from the edge of the spigot to edge of glass from each end,(this is a guide as long as the distance is no less the 150mm. |
| Step 3 | Use the cordless drill to pre-drill the holes in the decking for the mini posts. Use the screws to then secure all of the posts to the decking. |
| Step 4 | Remove the string line, then place the cover plates over the top of the mini posts. This hides their screws and makes them look visually appealing. |
| Step 5 | Be sure all gaskets and compression plates are properly fit inside the mini posts. Leave part of the grip out so that when you place the glass fence in the post, it slides into the post. |
| Step 6 | At times you may need to use spacers. These spread the gaskets apart and make it easier to insert the glass panel. Put on your glass gloves and have someone help you to put the first glass panel into the mini posts. |
| Step 7 | Use the spirit level to check that the panel is level. Insert the rest of the panels into the mini posts. Use the tape measure to make sure the gaps between all of the glass panels are even. Refer to plan provide by AVI Glass if applicable. |
| Step 8 | To make sure the panels are secure, use the Allen key to tighten the bolts on all of the mini posts. If you need to make them level, use the packers from the kit. Adjust if necessary. Be sure to make sure you do not over tighten as this may affect the integrity of the glass. |
| Step 9 | Now you can install the rest of the mini posts and glass panels around the pool or spa. Remember to leave the correct distance between a glass panel and a hinged panel with the pre- drill holes in, to install the glass gate. |
| Step 10 | Follow the instructions in the kit to assemble the hinges for the door. Insert the hinge bolts through the pre-drilled holes and tighten the nuts and bolts with a spanner and Allen key. Repeat this for the second hinge. |
| Step 11 | Put on your glass gloves and have someone help you lift the glass door between the two panels. Place blocks below the door to help support it, while you attach the hinges. |
| Step 12 | As before, attach both hinges to the glass door panel. Make sure you place the rubber protectors for the hinges on both sides of the glass. |
| Step 13 | Follow the instructions to attach the first part of the latch to the gate. Simply insert the bolts through the holes in the gate and tighten them with an Allen key. |
| Step 14 | Slip the second part of the latch onto the glass panel. Close the door to make sure the two parts of the latch are aligned and lock. Use the Allen key to secure the second part of the latch. |
| Step 15 | Follow the instructions to tension the hinges. Use the large pin to tension the hinge and the small pin to lock it into place. Check that the tension is tight enough by opening the gate and seeing if it closes automatically. If it doesn’t, adjust the tension until it does. |
| Step 16 | Place the two spiked caps on the door hinges. This will prevent anyone from using the hinges to climb over the fence. |
| Step 17 | Step back and enjoy your new AVI Fully Frameless Glass Fence. |
Consult with our specialists today to request an obligation free quote.
Request a Quote